
Creating a Home Active Directory Lab

Good afternoon folks!
I've recently been studying for my CRTP, but my lab access expired. Now, I could pay for more time in the labs, but the elegant misconfigurations demonstrated by Nikhil Mittal in the CRTP really fascinated me. How easy was it to end up with one of these settings that I've been working on breaking? Was it really that common and easy to end up with? So, I decided to create my own labs. This is just a starting point, and from here, you can add additional services, users and workstations. Active Directory is used by over 95% of businesses, so understanding how to build it, how the parts fit together and also how to attack it should be a tool within every pentesters repoirtoire.
Before I start, I've put a couple of resources that were fantastic in writing this guide and they do a far better job than me!
Let's get into it!
Necessary Downloads
First up, you'll need to start downloading the .iso files for Windows Server 2019 and Windows 10 Enterprise. The former will be our Domain Controller, the latter our workstations.
- https://www.microsoft.com/en-us/evalcenter/evaluate-windows-server-2019
- https://www.microsoft.com/en-us/evalcenter/evaluate-windows-10-enterprise
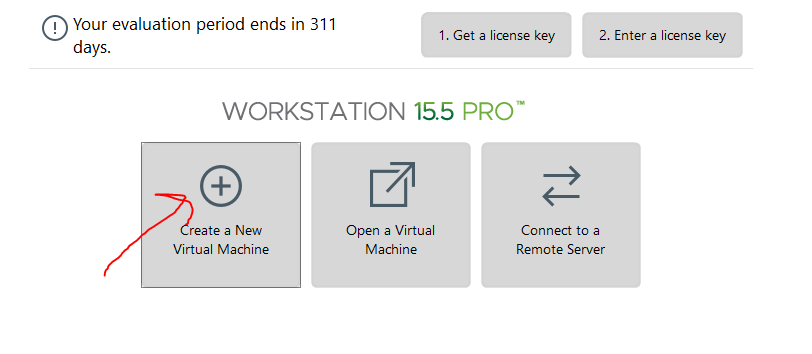
I'll assume you have VMWare or VirtualBox running and prior knowledge of setting up VM's, but I'll still go over the basics. Click to create a new virtual machine and select your Windows Server 2019 iso that was previously downloaded. This will be our domain controller!
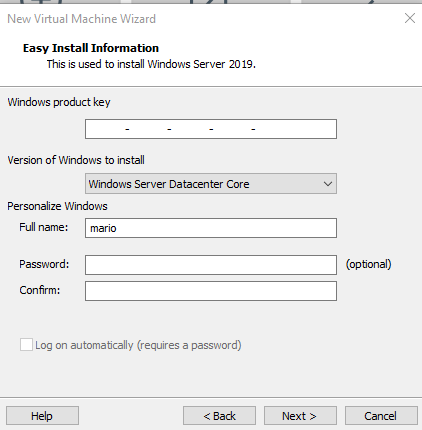
You can enter a full name but don't worry about putting a password or product key, we will sort this later.
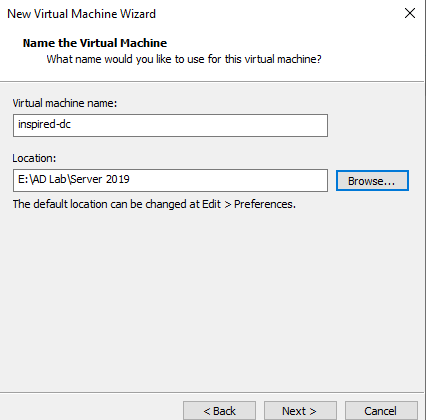
Set an appropriate name and save it in an appropriate location. 60gb is enough, but you can increase it if you have more space available.
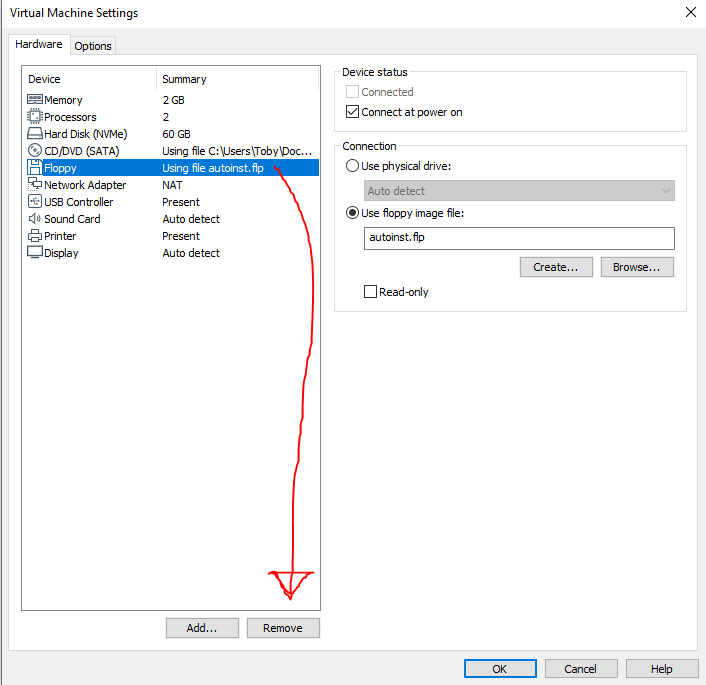
Ensure the "Power on after creation" is NOT ticked, and then finish the setup. Then go to VM > Settings. Here you can increase the RAM if you have spare memory available, and while we're here, we'll need to delete the floppy disk.
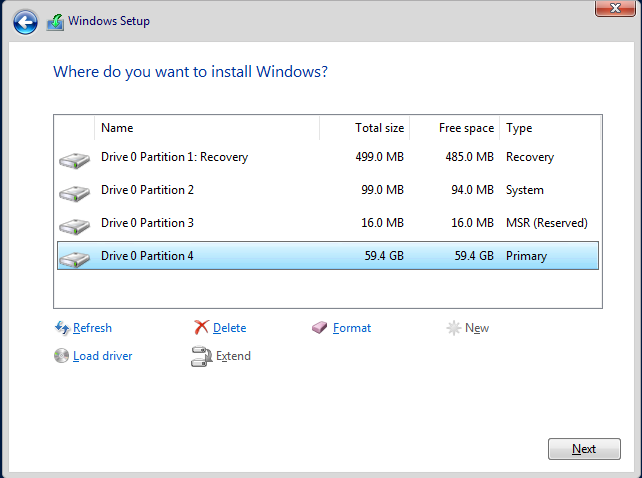
Finally, ensure it is on NAT in the network settings. Start the machine and ensure you press a key quickly when it's loading to get into the boot menu. Then select the correct OS and go through the setup. You should choose "Standard Evaluation (Desktop Experience)" otherwise you will just have a cmd prompt, which would make life a little harder for those of us who are not system administrators! When asked if you want to update or install windows only, select the latter option, then "New", then "Apply" and finally next. It should look like this.
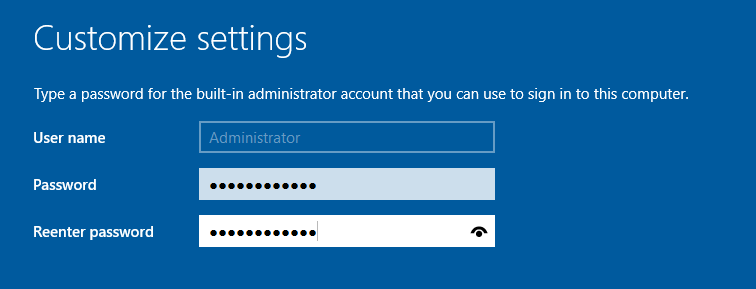
With that, the installation should start. When finished, it will prompt you for a username and password for your Administrator account. You can set it to whatever you like - I've made it easy to crack as it's an intentionally vulnerable lab.
On the login page, click the button at the top of VMWare to send Ctrl-Alt-Del to the machine to get past the lock screen.

You should now be logged in! I recommend ticking the "Discover other computers in the network" setting at this point (If you miss it, and then consequently stuff breaks, check this out).
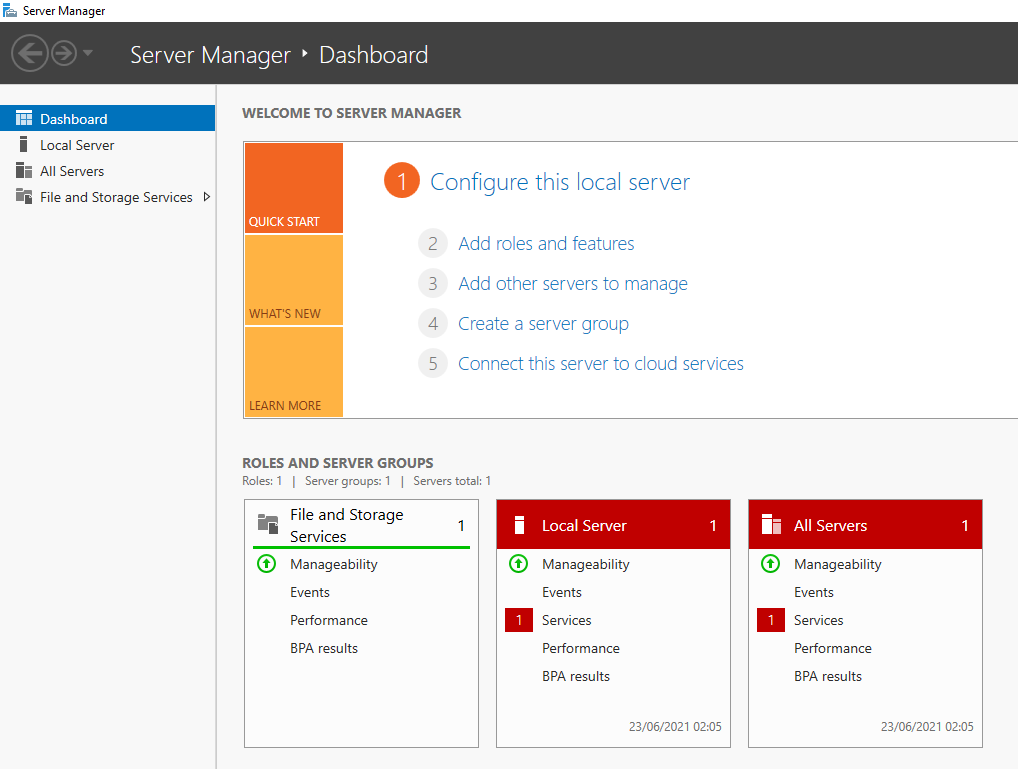
Head to VM > Install VMWare Tools so we can full screen our virtual machine. A pop up will appear in the bottom right. Click it and then run setup.exe. Keep the standard settings. Once this is finished, go to View > Fit Guest Now. It should now be in full screen with the server manager opened.
Head to the search bar down the bottom right and search for rename. Click on view your computer name and then press "Rename this PC". Remember to make it something you'll recognize when in the environment; this is your domain controller!
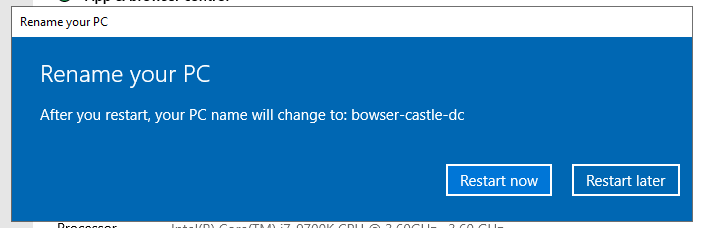
Make sure you restart to update the name. It should now be possible to login to your domain controller!
Upon logging in, within the server manager screen, press on "Manage" in the top right corner and then "Add roles and features". Continue pressing next until you reach the "Select Server Roles" menu. Add "Active Directory Domain Services".
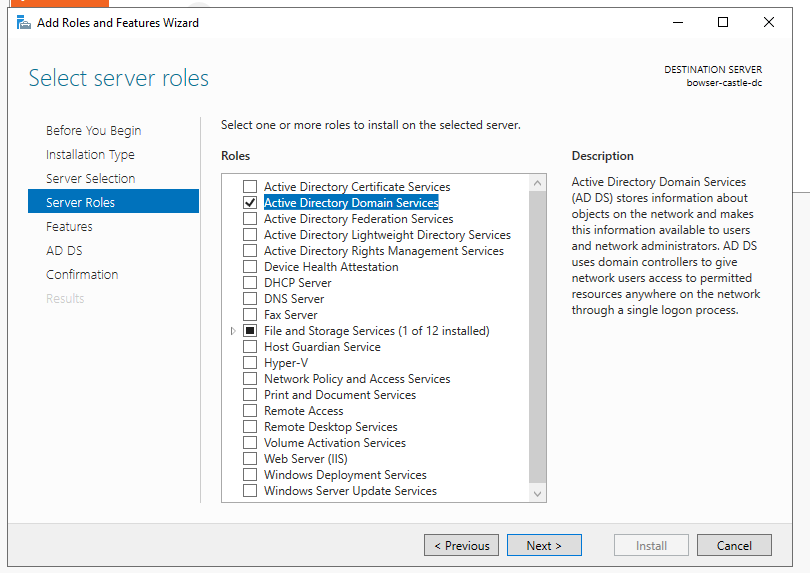
Hit next until you get to the installation page and install it. When finished, there will be a flag with a yellow exclamation point by the Manage button in the top right. Click it, and then press "Promote this server to domain controller". Change it to "Add a new forest" and enter your forest root domain name.

Hit next and enter a DSRM password. The DSRM password is the local administrator account password that is used when a server is promoted to domain controller. Hit next until you get to the NetBIOS domain name screen. Hopefully, it populates automatically. Check it's correct, then continue pressing next until you get to the pre-requisites check. When allowed, press "Install" and reboot the server when prompted.
The login screen will now show your domain as well as the username. Login as your administrator.

Now we're going to add certificates to allow secure LDAP configurations, which will allow us to practice attacks such as IPv6 takeovers (thanks Heath Adams). Once again. we'll add roles and features using the manage button in the top right and press next until we get to "Select server roles". We'll add AD Certificate Services here.
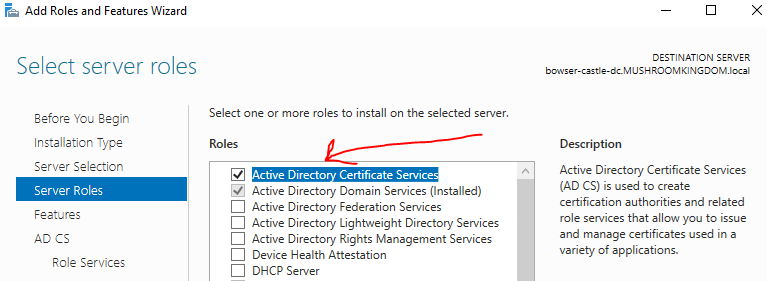
Hit next until you get to the install page and then install it.
When it's finished, press the flag in the top right and go on "Configure Active Directory certificate services". If the credentials don't populate automatically, hit change and enter your domain\username and password. Hit next and select the first option, Certification Authority. Leave the next few screens as default and hit next until you arrive at the confirmation page (unless you wish to specify different algorithms and key life-time). Hit configure, then restart your server.
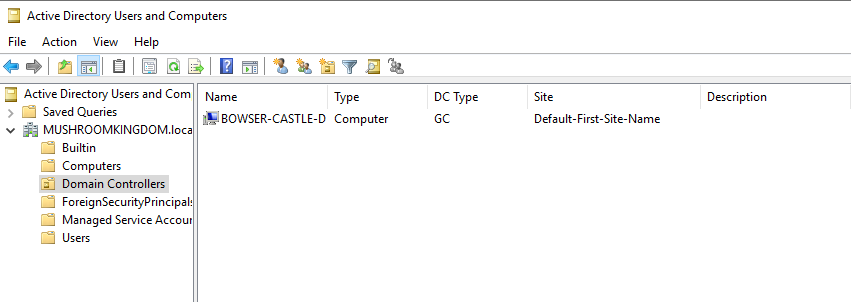
Once restarted, we'll need to add some objects to our Active Directory environment. Hit "Tools" > "Active Directory Users and Computers". It should resemble something like below.
First, let's add another user account account to target as a red-teamer. We'll go to "Action" > "New" > "User".

Enter a password and make sure the "User must change password" is unchecked and "Password never expires" is checked. Right click and copy this user for as many times as you like to build out your AD users.
Extra Mile Challenge
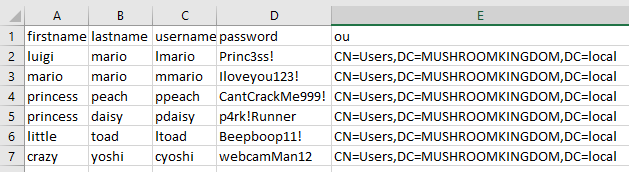
Alternatively, for those who like a challenge or want to add hundreds of users. Make a quick excel file with minimum 5 columns, as seen below, and populate the information. You'll have to replace your OU.
NOTE: Ensure the passwords are complex enough otherwise the default domain policy is to reject them.
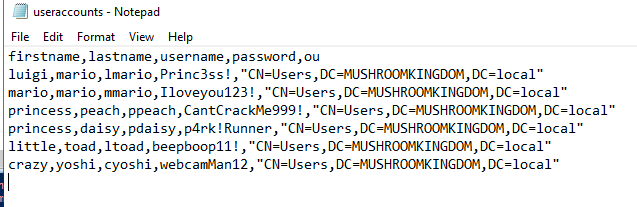
Export it as a .csv file and transfer it to your server. Remember where you save it!
Open up ISE - the powershell editor - and create a new file. Enter the code below, changing the parts which I've denoted.
Import-Module activedirectory

#Point to csv file containing users!
$UserFile = Import-csv C:\Users\Administrator\Documents\useraccounts.csv

#Change this to your domain
$Domain = 'MUSHROOMKINGDOM.local'

foreach ($User in $UserFile)
{

	$Username 	= $User.username
	$Password 	= $User.password
	$Firstname 	= $User.firstname
	$Lastname 	= $User.lastname
	$OU 		= $User.ou

	#Check user does not exist
	if (Get-ADUser -F {SamAccountName -eq $Username})
	{
		 #If user exists...
		 Write-Warning "Error! $Username already exists."
	}
	else
	{
	    #Otherwise...
		New-ADUser `
            -SamAccountName $Username `
            -UserPrincipalName "$Username@$Domain" `
            -Name "$Firstname $Lastname" `
            -GivenName $Firstname `
            -Surname $Lastname `
            -Enabled $True `
            -DisplayName "$Lastname, $Firstname" `
            -Path $OU `
            -AccountPassword (convertto-securestring $Password -AsPlainText -Force) -ChangePasswordAtLogon $False -PasswordNeverExpires $True

	}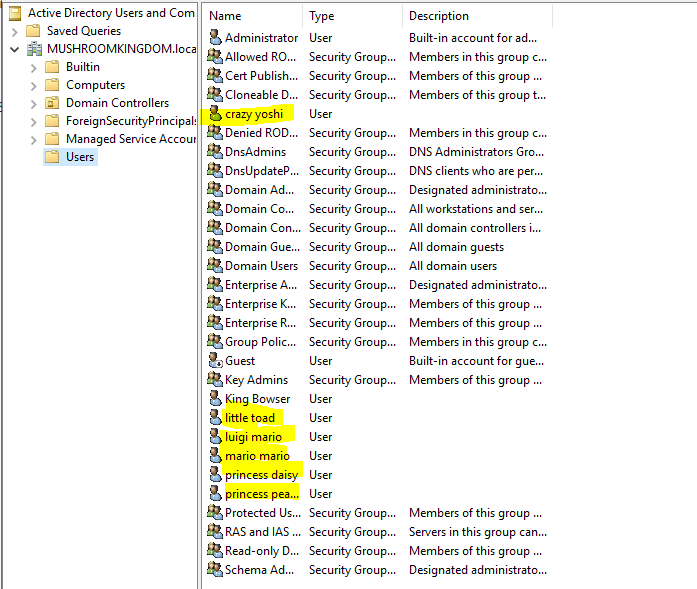
}Run this in the server by pressing the green play button in ISE, then check your active directory users again. It should now show all the new users! Try to add extra fields to the script if you want a challenge - Microsoft documentation is great!
Service Accounts
Awesome. Now let's add a vulnerability to our system by adding a service account running as Domain Administrator. As previously mentioned, I recently partook the CRTP course and one of the vulnerabilities that you learn about in the course was kerberoasting, the cracking of service account passwords offline by obtaining a valid TGS. So let's re-create that scenario using an SQL Server account. Copy the Administrator account and add a service account.

Set the password to something crackable, so that we can successfully perform the kerberoast. I set mine to P4ssw0rd123!.

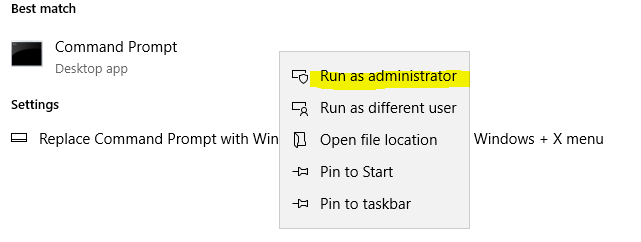
Open your command prompt as administrator.
Then type the following, changing the username to whatever you set your SQL account's username to. If you've forgotten, open it back up in your Active Directory users and go on the SQL accounts' properties. Ensure that you choose an arbitrarily large port, not a common one. This will change the account to a service account by assigning it an SPN.
setspn -a MUSHROOMKINGDOM/SQL-SVC.MUSHROOMKINGDOM.local:55555 MUSHROOMKINGDON\SQL-SVC
It should end produce something like this.

Oh no.. Please don't! (Descriptions)
Another tidbit of knowledge taught in the CRTP was that many times, in real world scenarios, administrators or users set their password in their description. We can add this quickly by right clicking any of our users that we added and going to properties, then in the general tab, adding their password reminder to the description.
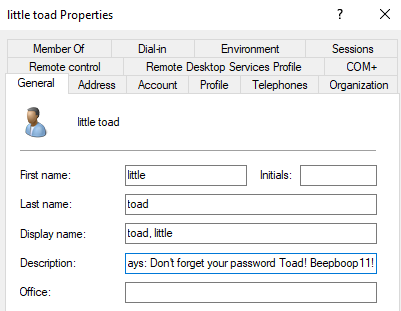
Hit apply to save, and let's move on.
SMB Shares
Now we'll add an accessible share to explore attacks through the Server Message Block protocol and also to examine, in the future, what sort of information gets relayed around the server when someone tries to access these types of objects.
On the left, go on File and Storage Services > Shares > Right click in the shares and go on "New Share".
Leave it as a default quick share, hit next until you get to naming it. Give it a memorable and intriguing name!
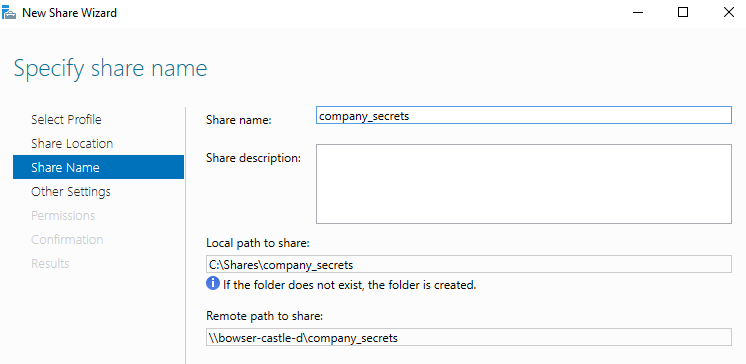
Now hit next until you get to create, and then you're done with opening up SMB.
Windows 10 Machines
With the server set up, we'll now set up our Windows 10 client. You can get by with just one, but I recommend at least 2 to perform various attacks that involve relaying hashes. Create a new virtual machine again using the Windows 10 .iso this time! Repeat the previous steps with the Server 2019 in regard to set up. This means you delete the floppy disk in the VM settings, ensure that it is on NAT, set your languages etc. I won't go through every step here as it's pretty similar to what we've already done.
When you get to the Microsoft Account Sign-In, click the "Join a Domain" in the bottom left instead and enter the name of one of the users you added.

Enter a password and security questions. This is your local account, not your domain account, which had its password set already when we were adding users to the server. Complete the setup as you wish. While it starts up, repeat the process if you want to have additional computers on your domain. I'll add 2 more quickly by repeating the process with the Windows 10 .iso. As we did with the server, it might be an idea to quickly install vmware tools to allow full screen.
VM > Install VMWare Tools > Click the popup > setup.exe
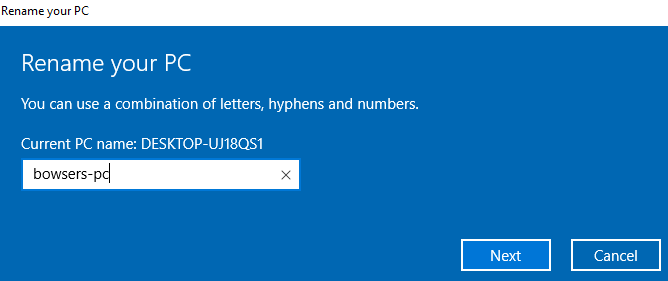
Don't restart yet, as you'll need to restart in just a minute! Once that's all sorted, rename the computers to whatever you want by searching for "rename" again. I've just set them to the planned users first name and then pc.
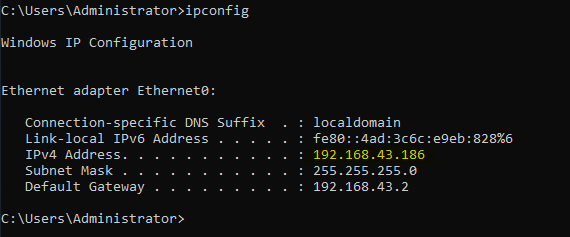
Restart and repeat the process with all the computers you wish to do it with. Now we need to join our computers to the domain. Grab the IP address of your domain controller by logging back into it and opening a command prompt, then type ipconfig and identify the correct address.
Head back to your client and open your network and sharing center by right clicking your internet logo in the bottom right and going on "Open Network and Internet Settings".
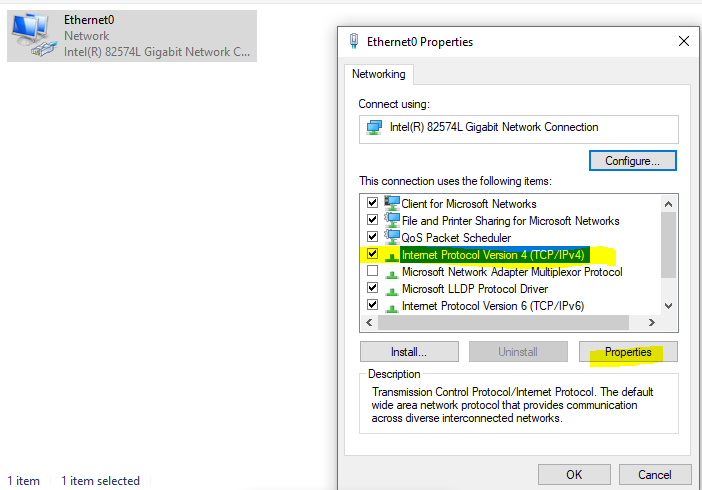
Under "Advanced Network Settings" click "Change adapter options". Right click your ethernet and go on properties. Highlight the IPv4 item and then press properties again.
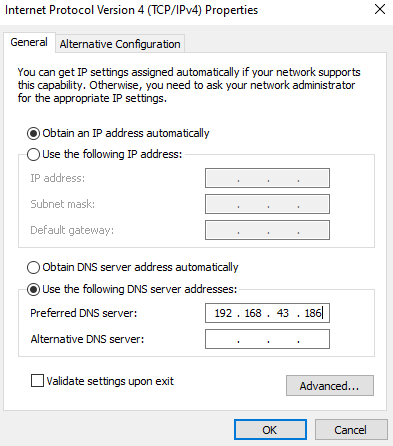
Under the DNS settings, change it to your Domain Controllers IP that we just identified on by using ipconfig.
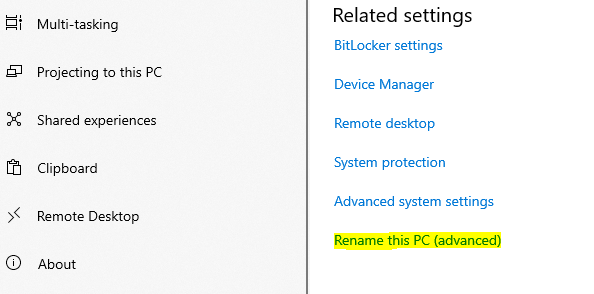
Close out of all of these and ensure you apply any changes. We're now ready to join this PC to the domain. Open a file explorer and right click on "This PC" then go to properties. From here, scroll down to the bottom to "Related Settings" and find the "Rename this PC (Advanced)" button.
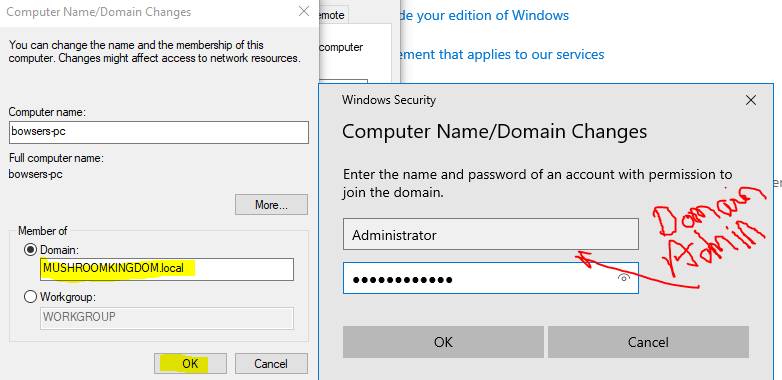
Click Change. Then at the bottom, tick the Domain box and enter the domain details. Hitting OK should prompt for the Domain Administrator details - this is normal when trying to add a new user to the domain.
Press OK and restart. Confirm that the changes took place and the computer was successfully added by logging into your domain controller, checking your users and groups and seeing if a new computer has now joined the domain.
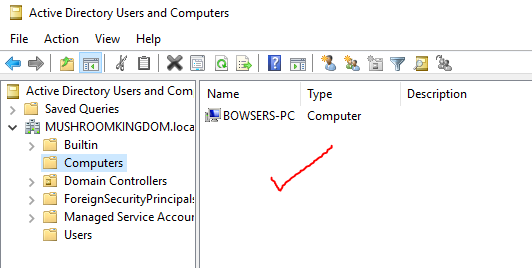
Success! Repeat with your other machines to get them all domain connected.
Setting up the Enviroment
Big thanks (again) to The Cyber Mentor for the guide in this video as to setting up the environment for relay attacks.
On one of your domain joined computers login screens, click Other User in the bottom left and sign in as your domain administrator. What we are going to be doing is making the bowser domain user a local administrator.
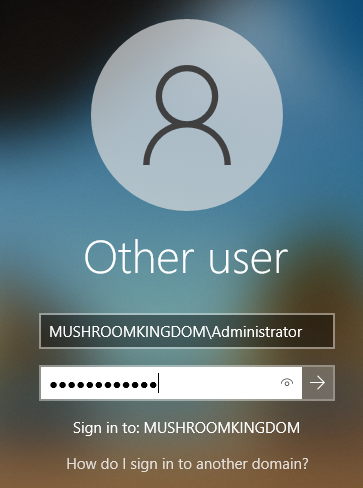
This isn't secure, but according to TCM, it's pretty common, so we're going to set it up for practice! In the search bar type "Computer Management" and load it up. Then go "Local Users and Groups" > "Groups" > "Administrators" > "Add". Start typing your domain username you wish to add and hit check names for it to automatically populate.

Add a second domain user as a local administrator on another workstation, if you set up two. For example, I've made domain user mmario a local administrator on the computer marios-pc.
Finally, on all the Windows 10 clients, we need to enable network discovery. Open file explorer and then click "Network". It should pop up with an error. Press OK and then a bar should pop up. Press click to change, then "Turn on Network Discovery". It should not be possible to perform relay attacks such as LLMNR poisoning and credential relay attacks!
Performing a Test Attack - LLMNR Poisoning
So, with everything set up, let's test it all out! There is lots of resources out there on LLMNR, but essentially, LLMNR (Link-Local Multicast Name Resolution) is used to perform look-ups in a network when DNS fails.
If the user tries to access a share that does not exist, the DNS will not be able to propagate the DNS name. In this scenario, the machine will then send out a broadcast to the network requesting information on how to connect to the share. Since the share does not exist, there will be no valid answers, but an attacker can perform a man in the middle attack (MITM) and reply to the request. They ask for the users hash with the promise to connect them to the requested drive.. of course, they don't! They take the hash and crack it instead, or relay it to access resources.
We'll be using the responder tool, from impacket, on our Kali Linux attack box, connected to the same network (NAT) as our domain is on.
sudo responder -I eth0 -rdwv
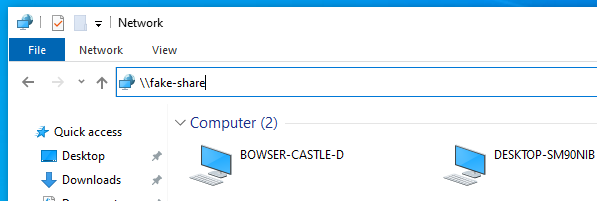
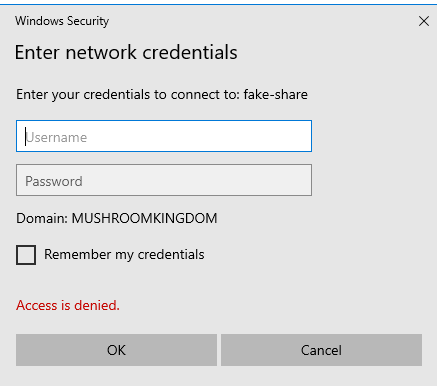
Responder will now be listening for events on the network. On one of the windows machines, we can now try to access a non-existant share by opening the file explorer and using the address bar. I just tried to access \\fake-share\ and it prompted me to enter a username and password with an access denied message, as it does not know where to find the share.
Heading back over to our attacking machine running Responder, we can see that we've successfully intercepted that request and captured the users hash!

Great. We have the users hash - so what can we do with it? Well, we can save it to a text file and try to crack it with hashcat. Save the hash to a file called bowser_hash.txt and then use hashcat to crack it in mode 5600, for NTLMv2. I've added a rule list, you can find one on github.
hashcat64.exe -m 5600 bowser_hash.txt rockyou.txt --rules d3ad0ne.txt
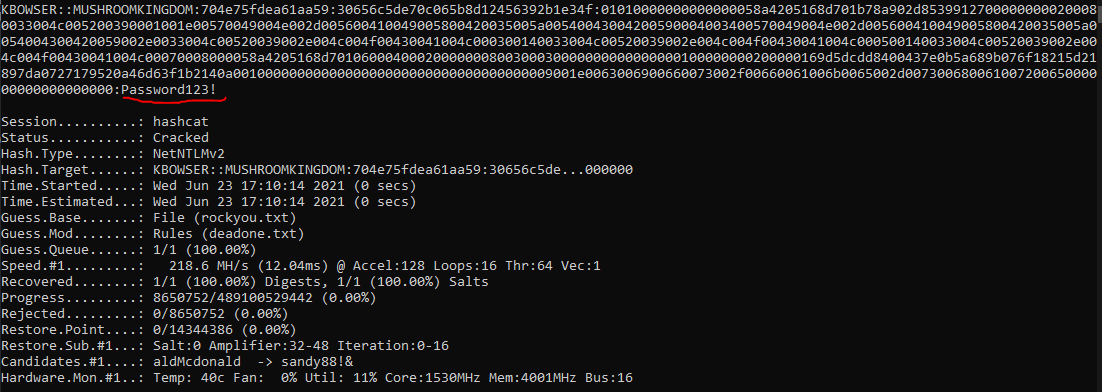
As we can see, it successfully cracked the password of the domain user.
Takeaways
That just about wraps it up from me here, we've set up a domain controller, added a kerberoastable account, poor password management policies and enabled local administrator access to domain users. Then we tested it all by demonstrating an LLMNR poisoning attack with workstations and successfully cracked the hashes to demonstrate how one would laterally move within an environment.
This lab will provide the foundation for practicing internal penetration testing techniques and methodology, and I hope that it's been of use and worked as expected. I know I'll be busy testing my CRTP weak points here and exploring the misconfigurations further, maybe even doing a bit of security research on the Windows Operating System! The world is your oyster.
On the off chance that something isn't working, please don't hesitate to get in touch with me via LinkedIn, Twitter or Discord (inspired#1745).